

A few days ago I came across a post where a car owner said: “I spent four or five hundred yuan on ceramic pads, but the brakes still squeal when I step on them. The mechanic says it’s a common issue—is he trying to rip me off?”
The comments had people saying “ceramic pads are like this,” others saying “you need to grind the back surface,” and one veteran mechanic who simply said: “Ask him to wipe the guide pin grease off and reapply fresh grease.”
The car owner actually tried it, and it worked.
The four or five hundred yuan pads took the blame, but the real cause was a few dollars’ worth of grease.
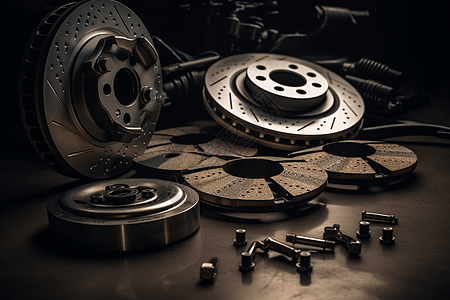
Three Most Common Brake Problems That “Don’t Get Better After Changing Pads”
① Squealing — You Think You Need to Grind the Pads, But You’re Actually Missing a Layer of Anti-Squeal Grease
There is no lubrication between the brake pad backing plate and the caliper slider track. At high temperatures, every brake application causes direct metal-to-metal friction. Ordinary grease melts when heated, picks up brake dust, and turns into an abrasive compound—making the noise even worse. Ceramic-based anti-squeal grease withstands temperatures up to 1400°C, does not coke or drain away, and only by applying a layer can you truly eliminate squeal.
② Drag / Failure to Release — You Think the Caliper Is Faulty, But the Guide Pin Is “Pickled”
After braking, the hub runs hot and the car pulls forward—it is exhausting to drive. Upon removal, the rubber dust boot on the guide pin has deformed and swollen, pinching the pin and seizing it. The primary cause is using the wrong grease—mineral oil swells rubber, ordinary lithium-based grease cokes and seizes after high-temperature drying, and once sealing is compromised, dust and moisture get in, causing the guide pin to rust and seize slowly.
③ Uneven Wear — You Think the Pads Are Faulty, But Actually One Side Is Not Retracting Properly
During a pad change, you find the inner side is nearly worn out while the outer side still has half its material remaining. This situation typically results from a seized guide pin, causing the single-side caliper to not retract fully, so the brake pad continuously grinds on one side. Changing the pads does not help—if the guide pin seizure is not resolved, the other side will wear through quickly too.
Applying Ordinary Grease to Brakes Is More Common Than You Think
I have seen many experienced mechanics, before changing pads, casually grab a tube of grease from the toolbox, apply a circle on the guide pin and a circle on the pad backing plate—quick and clean.
Daily commuting on sunny days? No problem. But taking a mountain road drive, wading through rainwater, or sitting in stop-and-go traffic with repeated hard braking—the shortcomings of ordinary grease are fully exposed: it flows away at high temperatures, solidifies at low temperatures, absorbs water and emulsifies, corrodes metal, and swells rubber.
A quality brake guide pin grease that remains stable from –40°C to 150°C, is compatible with rubber dust boots, and passes salt spray testing—this is brake-specific grease.
Changing Pads Completes Only Half the Job; The Other Half Is Called “Maintenance”
A complete brake service follows this correct sequence:
Step 1: Cleaning — Use brake cleaner to thoroughly remove old grease and dust from the guide pin, caliper slider track, and brake pad backing plate. Old grease not removed means new grease is applied in vain.
Step 2: Guide Pin Lubrication — Apply dedicated guide pin grease to the guide pin metal surface, penetrating inside the dust boot. It must not congeal at –40°C or flow away at 150°C. Also confirm the grease will not swell the rubber dust boot.
Step 3: Anti-Squeal Grease — Apply a thin coat to the contact surface between the brake pad backing plate and caliper to reduce vibration friction. High-temperature stability is the key, not coating thickness.
Step 4: Anti-Seize Compound — Apply a small amount to the hub-to-brake disc contact surface to prevent the next wheel removal from being complicated by rust seizure. This step has low customer visibility, but the mechanic will appreciate it next time the wheel is removed.
Changing pads without servicing the guide pins is like installing new tires but overtightening the lug nuts—it will drive, but problems will surface eventually.
Closing Thoughts
For brake noise, checking the lubrication before changing pads is the right sequence—it can save car owners a lot of money and reduce comeback repairs for mechanics.
Do you service the guide pins when changing brake pads? Or have you encountered a situation where “pads were changed but still squealed, and it turned out not to be a pad problem”? Share in the comments—questions welcome.
To get the complete brake system lubrication and maintenance procedure card, send me a direct message with “brakes” and I will send you the full version—mechanics can use it directly, and car owners will know what to ask about.